Hey guys! Happy Friday! I’m psyched today because I found the perfect solution for TWO of my current COVID-19 practice problems:
1) Decision paralysis and 2) Practice monotony
I realized that the freedom and sheer magnitude of things I CAN practice have been preventing me from practicing! 😖
There are so many options for what to practice that I just can’t seem to decide! None of the options are wrong, but it’s still tough to pick something and just START. So here’s a fun solution:
🎲 A free app called Spin the Wheel! 🎲
This app is colorful, extremely customizable, and easy-to-use! You can create all kinds of wheels and even share them with friends! (I’m not sponsored by this app or anything, I just think it’s awesome!) You guys know I’ll be taking full advantage of all the colors! 🌈
First, I’ll go over how to create and customize your wheel, and then we’ll dive into how to use it to improve your personal music practice AND your private lesson teaching! It only took me about 2 minutes to create my wheel!
Part 1: How to set up your wheel!
Step 1: Download the app and click “Add New” to create your wheel!
App Store: https://apps.apple.com/us/app/spin-the-wheel-random-picker/id1467343690
Google Play: https://play.google.com/store/apps/details?id=com.spinthewheeldecider&hl=en_US
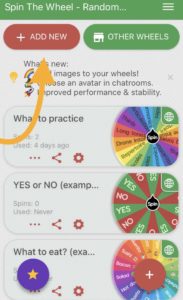
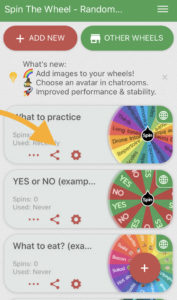
The homepage of your app will have some wheels preloaded for you, like a “Yes or No” wheel and a “What to Eat?” wheel.
Today we’ll be creating a new wheel, so click “Add New” to get started. (I’m using an iPhone, so this might look slightly different on an Android!)
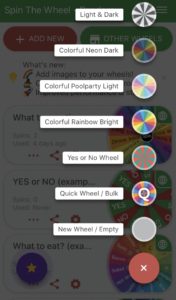
Step 2: Choose your color scheme or click “New Wheel/Empty”
I chose the “Colorful Rainbow Bright” wheel because it is cheerful and made me smile! You can also choose to create a new wheel from scratch, but for now, let’s edit a pre-made template because it will have all of the same options as creating a new wheel.
Step 3: Name your wheel and customize the choice options
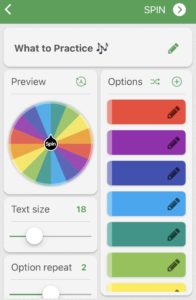
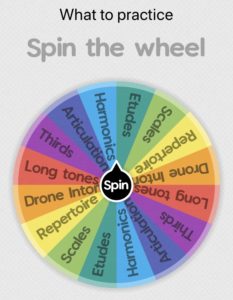
I want to create a wheel to help me decide what to practice, so I named my wheel “What to Practice!”
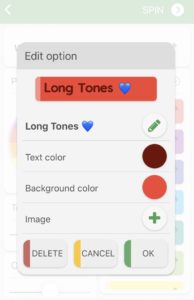
The “Colorful Rainbow Bright” template I chose came pre-loaded with 8 blank options. To modify your option text, click the little edit pencil in the Options section.
It’ll bring up a little window where you can change the text color, the wheel slice background color, and even add your own image! My first option is “Long Tones,” so I’ll type that into “Option Text” and add a <3 emoji (because I love long tones!).
Step 4: Finalize wheel options
You’re almost done! On the bottom left, there are few more options you can customize. You can change the text size, decide how many times each option repeats itself on the wheel, and how long the wheel’s spin will be!
Text Size: Making the text size smaller can help longer options fit better.
Option Repeat: If you have lots of options, set the option repeat to 1 so everything is clearly visible on the wheel. For my 8 practice options, I left the option repeat at the default 2.
Spin Time: If you want to build some suspense in your private lessons, try setting the spin time to “Looooong!” If you want to make a choice quickly in your practice, try the “instant” setting! I’ve left mine at the default “medium,” which still only lasts for a second or two.
Finished customizing your options? Click the preview button to make sure you like it!
Step 5: It’s time to spin!
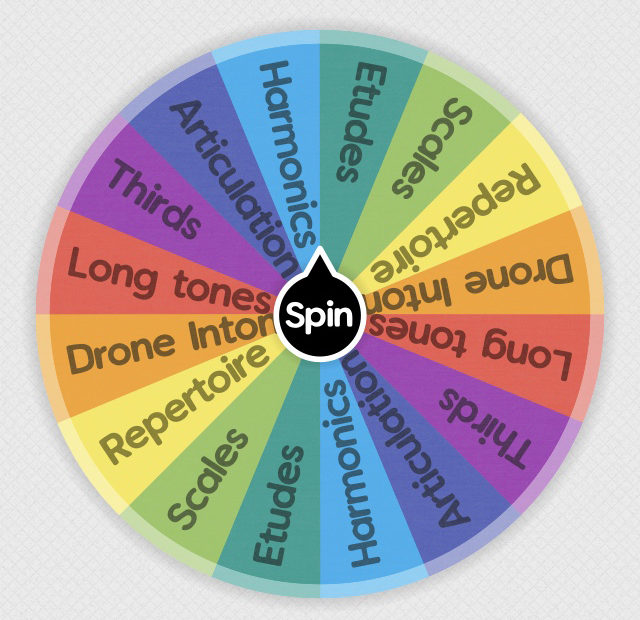
Here’s my final wheel. It’s time for me to practice some harmonics! 😀
Step 6: Share your wheel (optional)
This app also has some fun social features! You can share your wheel with your students by clicking the share button. If you want to upload your wheel to the Wheel Store, it costs 75 coins (the in-game currency), but you can share for free via text, email, facebook, and any of your favorite social apps!
It will share a direct link to your wheel where your students can spin it in their browser without needing to download the app! This is perfect for keeping them engaged during online lessons!
Part 2: How to use your wheel in practice and lessons!
Here are 7 nifty ideas about how we can use this app to solve practice problems, lesson monotony, and lack of engagement! (Get it? Lucky Number 7? 🤓)
Personal practice:
1. Dump all of your practice ideas into the app and let it decide for you! (the picture in Step 5 shows what I’m deciding between this weekend!)
2. List the different parts of your practice (scales, articulation, harmonics, repertoire, etc) and let the wheel decide the order you’ll practice them!
3. Want to mix up which page of your daily exercise book you’ll start with? Put in some page numbers and spin to decide the page you practice!
4. Do you need to practice your technique? List some of your neglected etude books and let the wheel pick your fate!
Social:
5. Create a practice challenge with your friends or studio! You can have one person spin the app and that’s the number of etudes/scales you’ll practice today.
Private Lessons:
6. Let the wheel decide some numbers! Like how many times your student will practice this week OR how many times they’ll repeat that measure in a row with no mistakes! (Check out Step 6 above for how you can share your wheel with your students so they can do the spinning!)
7. Do you normally include the same order of operations in your lessons? Like warm-up/scales, etude, repertoire, sightreading? Structure is great in lessons because students feel comfortable knowing what to expect. BUT! You can keep that structure and inject some newness and excitement by letting the wheel decide the order of operations! You still cover everything, but the student will be curious to know what comes next!
📣 There you have it! What do you guys think about this Spin the Wheel app? I love that you can include all of your favorite colors and emojis on your wheels! Will it help you solve any problems in your practice or lessons, or do you already use something like this? Let me know what you think in the comments below! 📣